GitHub - EST-iOS-TEAM2/Pinit: ESTSoft 2차 팀프로젝트
ESTSoft 2차 팀프로젝트. Contribute to EST-iOS-TEAM2/Pinit development by creating an account on GitHub.
github.com
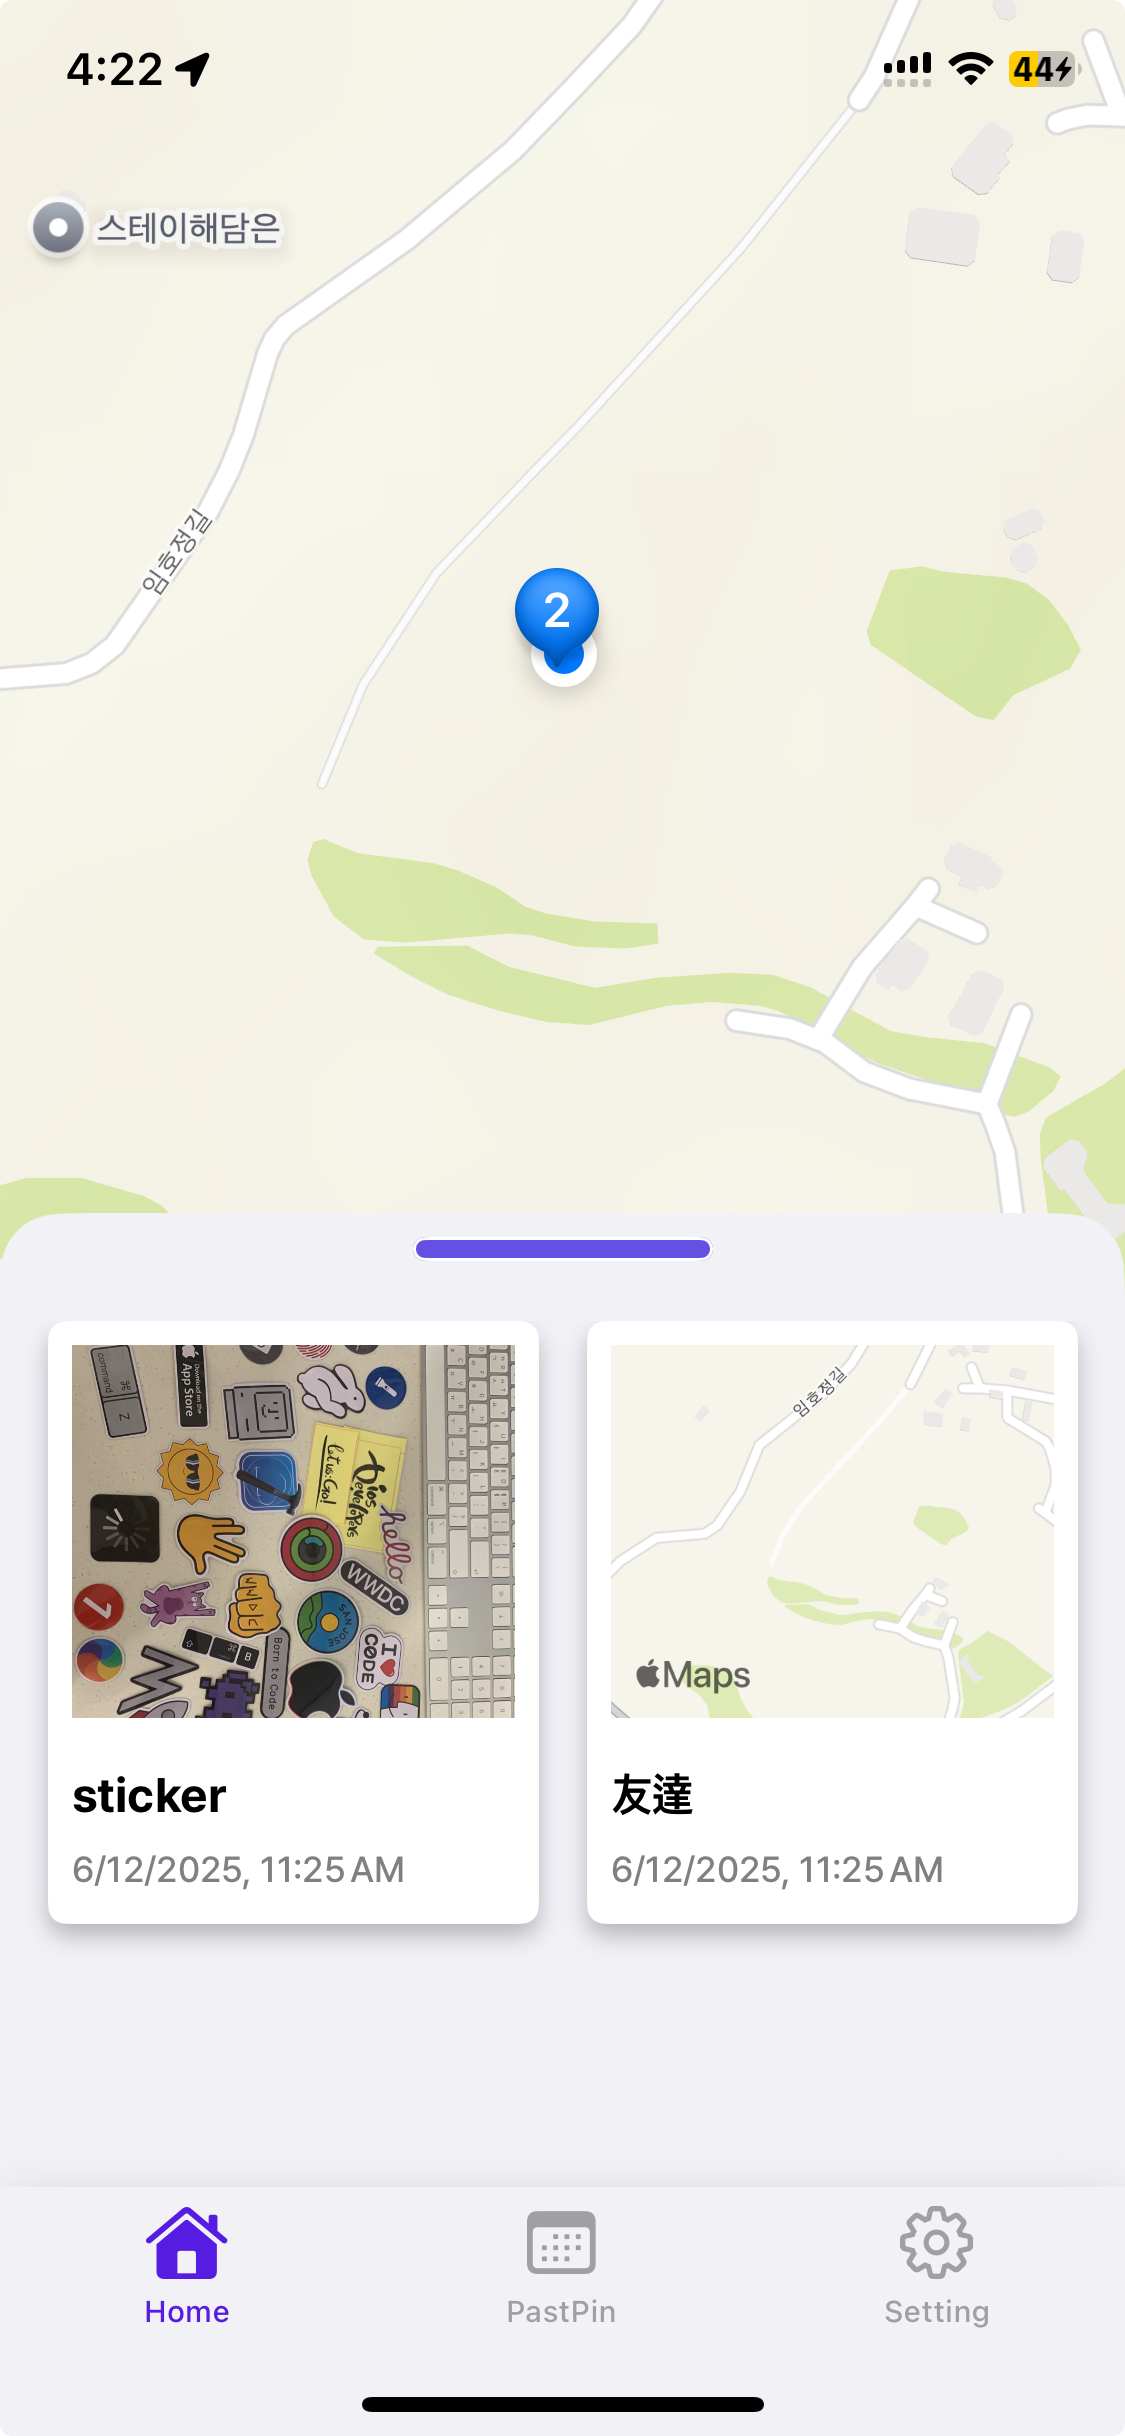
바텀시트 만들어보기
탭바를 가리지 않으면서 바텀시트를 홈화면에서 상시운용을 하려는데, 간단한 방법들로는 불가능한거 같아 직접 바텀시트를 만들게 됐다!

물론 검색해보면 엄청난 방법으로 만드는분도 있었지만, 이 프로젝트엔 간단하게만 사용되기에 만드는 방법만 좀 알아보고 적용해봤다.
바텀시트로 사용될 View
final class CustomBottomSheet: UIView {
    var collectionView = UICollectionView(frame: .zero, collectionViewLayout: .init())

    let grabber: UIView = {
        let grabber = UIView()
        grabber.layer.cornerRadius = 4
        grabber.backgroundColor = DesignSystemColor.Lavender.value
        grabber.layer.borderColor = UIColor.white.cgColor
        grabber.layer.borderWidth = 1
        grabber.clipsToBounds = true
        grabber.isUserInteractionEnabled = false //Grabber는 Guide용으로만 사용
        return grabber
    }()

    init() {
        super.init(frame: .zero)
        setupLayout()
    }

    required init?(coder: NSCoder) {
        fatalError("init(coder:) has not been implemented")
    }

    func setupLayout() {
        let cornerRadius = 20.0
        self.backgroundColor = .secondarySystemBackground
        self.layer.cornerRadius = cornerRadius
        // cornerRadius 상단 좌,우측만 적용하기
        self.layer.maskedCorners = .init(arrayLiteral: [.layerMaxXMinYCorner, .layerMinXMinYCorner])

        addSubviews(collectionView, grabber)

        grabber.snp.makeConstraints {
            $0.centerX.equalToSuperview()
            $0.top.equalToSuperview().offset(8)
            $0.width.equalTo(100)
            $0.height.equalTo(grabber.layer.cornerRadius * 2)
        }

        collectionView.snp.makeConstraints {
            $0.top.equalToSuperview().offset(cornerRadius*1.8)
            $0.leading.trailing.bottom.equalToSuperview()
        }

        collectionView.isUserInteractionEnabled = false
    }
}
먼저 바텀시트로 사용될 뷰를 생성했다.
Grabber를 만들어두긴 했지만, 가이드용으로만 사용하고 실제 인터렉션은 바텀시트 자체에서 처리할것이다.
그래서 isUserInteractionEnabled를 false로 두어 인터렉션 이벤트에서 아예 제외해버렸다.
물론 CollectionView는 완전 제외한것이 아니다! 가장 높이가 낮을때는 CollectionView는 보이지 않은 상태이니 false인 것,
나중에 높이가 높아지면 인터렉션이 가능하게 변경한다.
ViewController에 바텀시트 등록하기
class HomeViewController: UIViewController {
    // MARK: Variables
    // BottomSheet 동적 높이를 저장하기위한 변수
    private lazy var bottomSheetHeight: CGFloat = view.frame.height / 14
    ...

    // MARK: UI Components
    private var adapter: PinCollectionViewAdapter?
    private let mapView = MKMapView(frame: .zero)
    private let bottomSheet = CustomBottomSheet()

    ...

    override func viewDidLoad() {
        super.viewDidLoad()
        setupProperties()
        ...
    }

    private func setupProperties() {
        view.backgroundColor = .gray
        // 바텀시트 패닝 제스처 추가
        let panGesture = UIPanGestureRecognizer(target: self, action: #selector(panGestureHandler(_:)))
        bottomSheet.addGestureRecognizer(panGesture)
        // 버튼 액션 추가
        addPinButton.addTarget(self, action: #selector(moveToAddPin), for: .touchUpInside)
        currentLocationButton.addTarget(self, action: #selector(moveToUserLocation), for: .touchUpInside)
    }

    private func setupLayout() {
        view.addSubviews(mapView, addPinButton, currentLocationButton, bottomSheet)
        bottomSheet.snp.makeConstraints {
            $0.leading.trailing.equalToSuperview()
            $0.bottom.equalTo(view.safeAreaLayoutGuide)
            $0.height.equalTo(bottomSheetHeight)
        }
        ...
    }
    ...
}
먼저 bottomSheet를 선언하고, 높이를 동적으로 관리해주기 위해 bottomSheetHeight를 선언한다.
bottomSheet에 PanGesture를 등록해 드래그 했을때 위-아래로 자유롭게 움직일 수 있게 한다.setupLayout() 함수를 보면 bottomSheetHeight변수를 사용해 동적으로 constraint를 잡아주는 걸 볼 수 있다.
여기까지는 간단하지만, 조금 어려웠던 PanGesture로 등록한 함수 내용을 보자
여기에서 동적으로 높이를 변경하고 업데이트 해주었다.
BottomSheet에 사용될 PanGesture 등록하기
@objc private func panGestureHandler(_ gesture: UIPanGestureRecognizer) {
    // Pretend 크기 설정
    let small = view.frame.height / 14
    let medium = view.frame.height * 0.4
    let large = view.frame.height * 0.8
    // 제스처 시작
    let translation = gesture.translation(in: view)
    let newHeight = bottomSheetHeight - translation.y
    // 제스처 (드래그) 위치에 따라 업데이트
    if newHeight >= small && newHeight <= large {
        bottomSheetHeight = newHeight
        gesture.setTranslation(.zero, in: view)
    }
    // 제스터 (드래그 끝났을때) 위치에 따라 최종 높이 업데이트
    if gesture.state == .ended {
        // 높이 조정 pretend?
        if newHeight > (view.frame.height * 0.6) {
            bottomSheetHeight = large
            bottomSheet.collectionView.isUserInteractionEnabled = true
        }
        else if newHeight > (view.frame.height * 0.25) {
            bottomSheetHeight = medium
            bottomSheet.collectionView.isUserInteractionEnabled = true
        }
        else {
            bottomSheetHeight = small
            bottomSheet.collectionView.isUserInteractionEnabled = false
        }
    }
    bottomSheet.snp.updateConstraints {
        $0.height.equalTo(self.bottomSheetHeight)
    }
    // Constraint 업데이트 + Animation
    UIView.animate(withDuration: 0.07) {
        self.view.layoutIfNeeded()
    }
}
총 3개의 위치를 만들어두고 그 범위에 들어온다면 자동으로 높이를 조정되게 하고싶어 small, medium, large로 고정 높이를 만들어뒀다.
드래그를 시작할때 호출되는 함수기때문에 함수 시작부 부터 gesture.translation.y로 현재 제스처의 y위치를 가져온다.
그 값을 가지고 bottomSheet의 높이가 실시간으로 정해지지만, 초반에 정해둔 small, large를 벗어나면 y값을 갱신하지 않게 만들어뒀다.
제스처가 끝났을때(손가락을 땠을때)는 현재 bottomSheet Height가 어디에 가까운지에 따라서 small, medium, large가 정해지게 로직을 작성했다.
마지막으로 중요한 Constraint 업데이트!
SnapKit을 사용하고 있어서 간편하게 업데이트를 해줬지만, 이것만 하면 제대로 반영되지 않는다.
꼭 layoutIfNeeded()를 호출해 다시 그리게 해야하고, 부드러운 효과를 위해 애니메이션에 duration을 달아 처리를 해준다.
이렇게 하지 않으면 제스처에 따라서 확확 따라오기 때문에 일반적으로 사용하던 바텀시트와 사용감이 달랐다.

