

1. 프로젝트에 Firebase 추가
https://console.firebase.google.com/?hl=ko
로그인 - Google 계정
이메일 또는 휴대전화
accounts.google.com
Firebase console에 들어가 프로젝트를 생성하고 설명을 따라가면 쉽게 프로젝트를 생성할 수 있다.
GoogleService-Info.plist 를 프로젝트에 추가하고
2. Authentication에 사용할 로그인 제공업체 선택
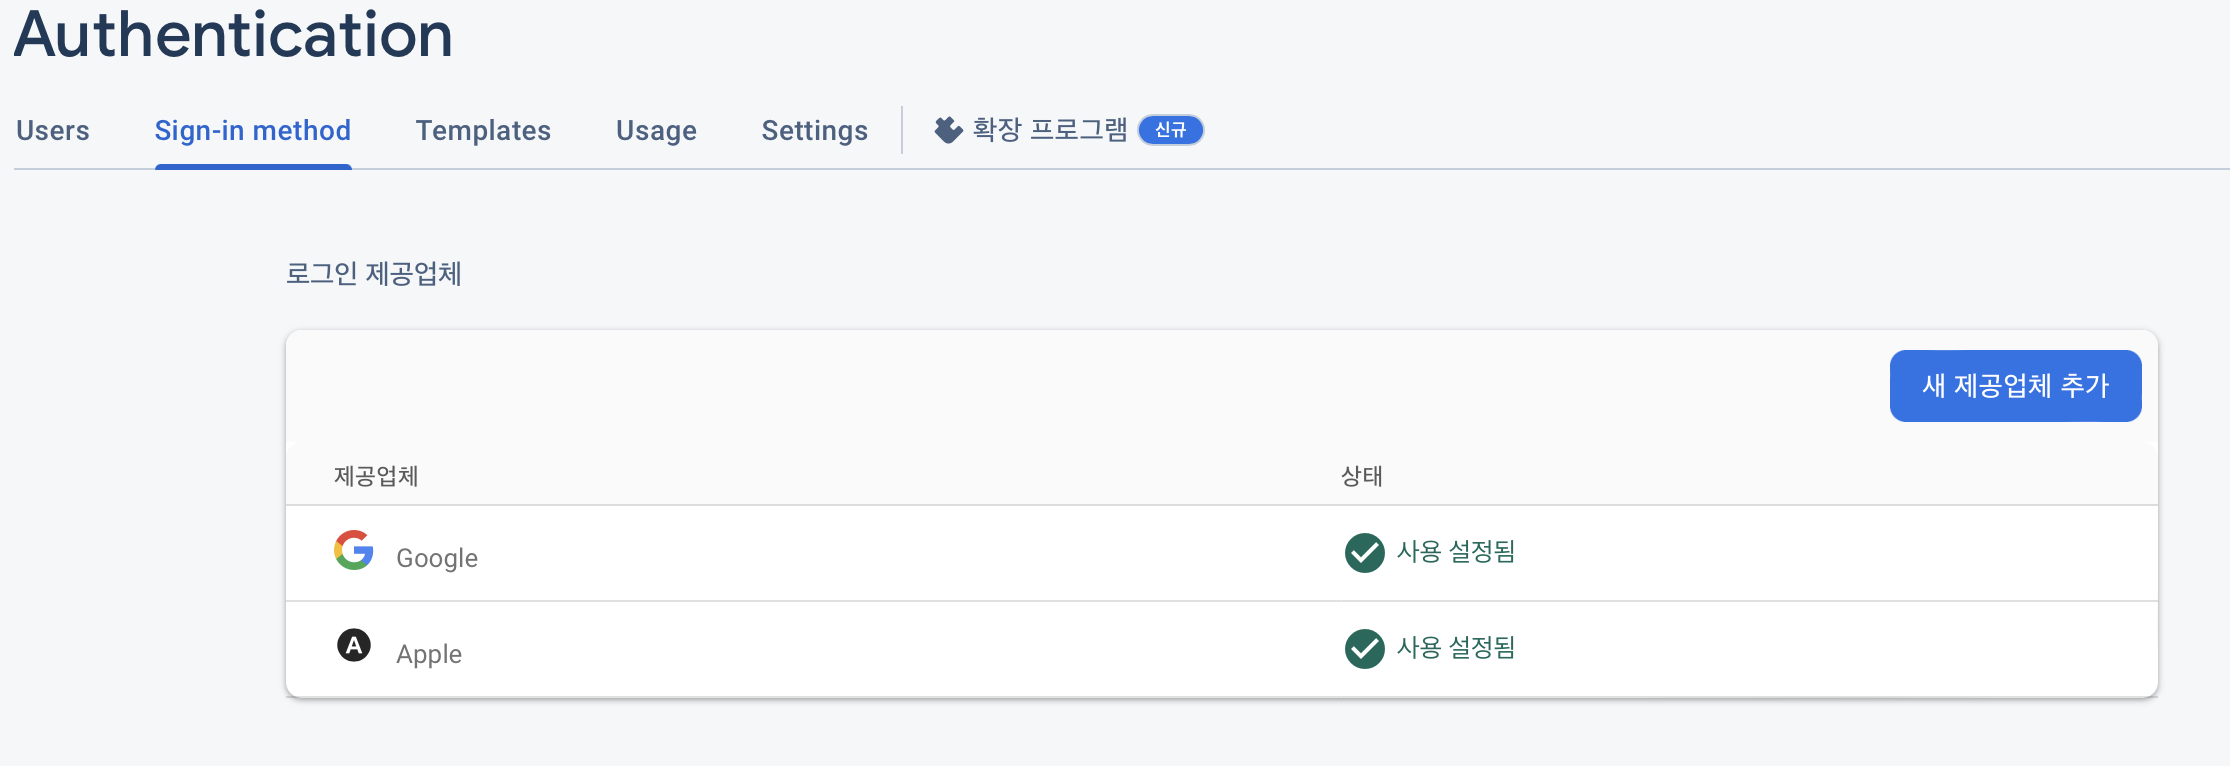
새 제공업체 추가를 누르고 구글, 애플을 추가했다
3. 프로젝트에 애플 로그인 설정
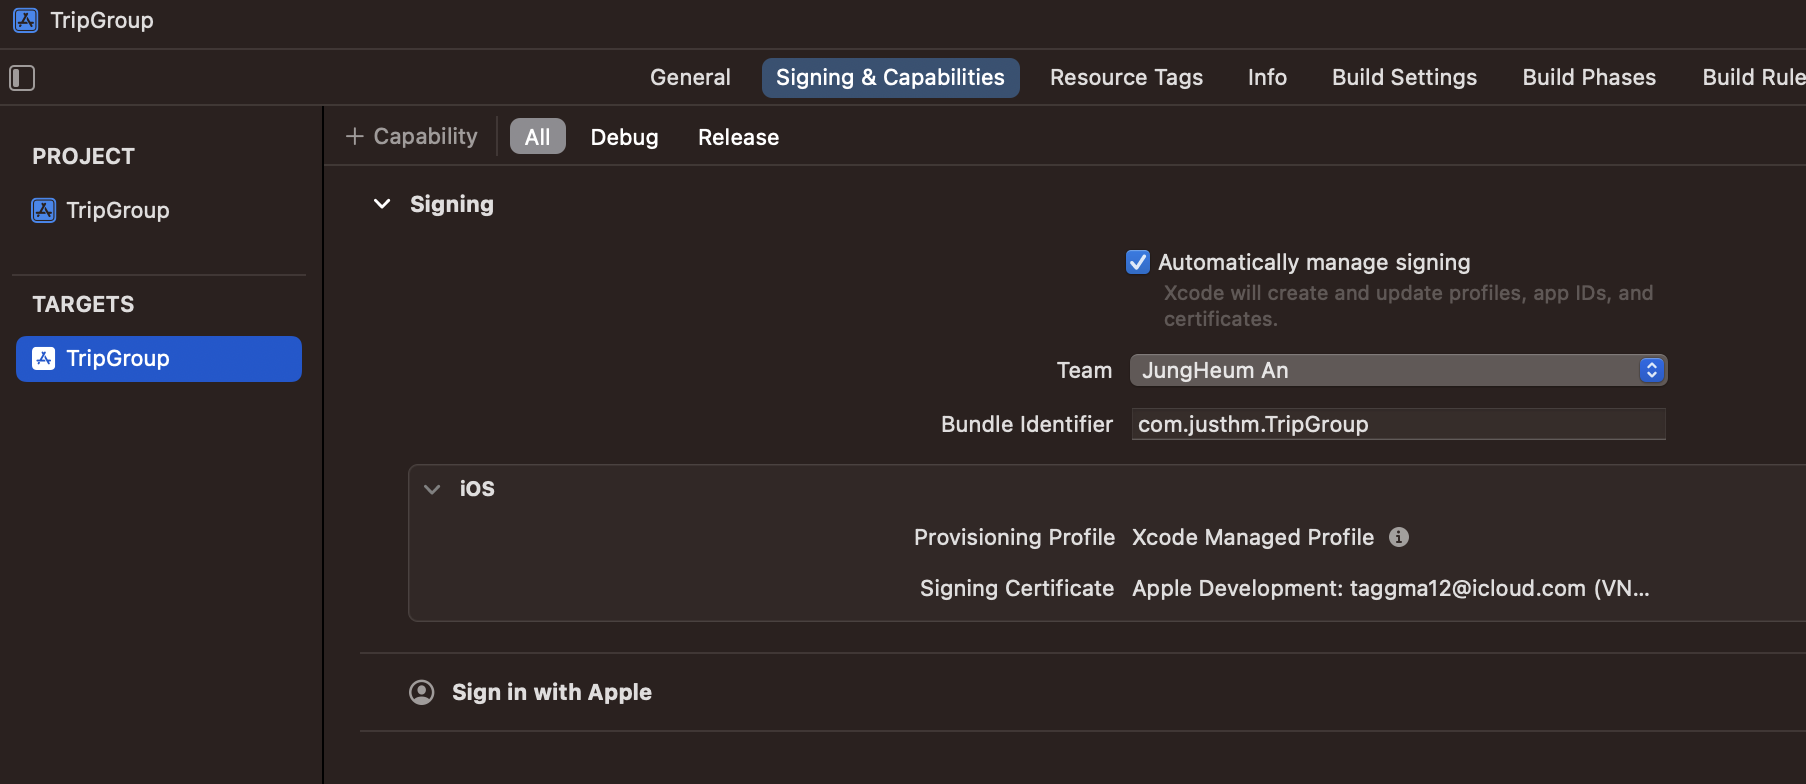
먼저 프로젝트에 들어가 Target의 Signing&Capabillities 를 선택하면 Capaillity를 추가할 수 있는 버튼이 있다.
버튼을 누르고 Sign In with Apple을 누르면 추가 할 수 있다.
Apple 로그인 서비스를 사용하기 위해서는 Identifier도 발급받아야 한다.
먼저 Apple Developer에 Certificates, Identifiers & Profiles에 들어가 Identifiers 탭으로 간다.
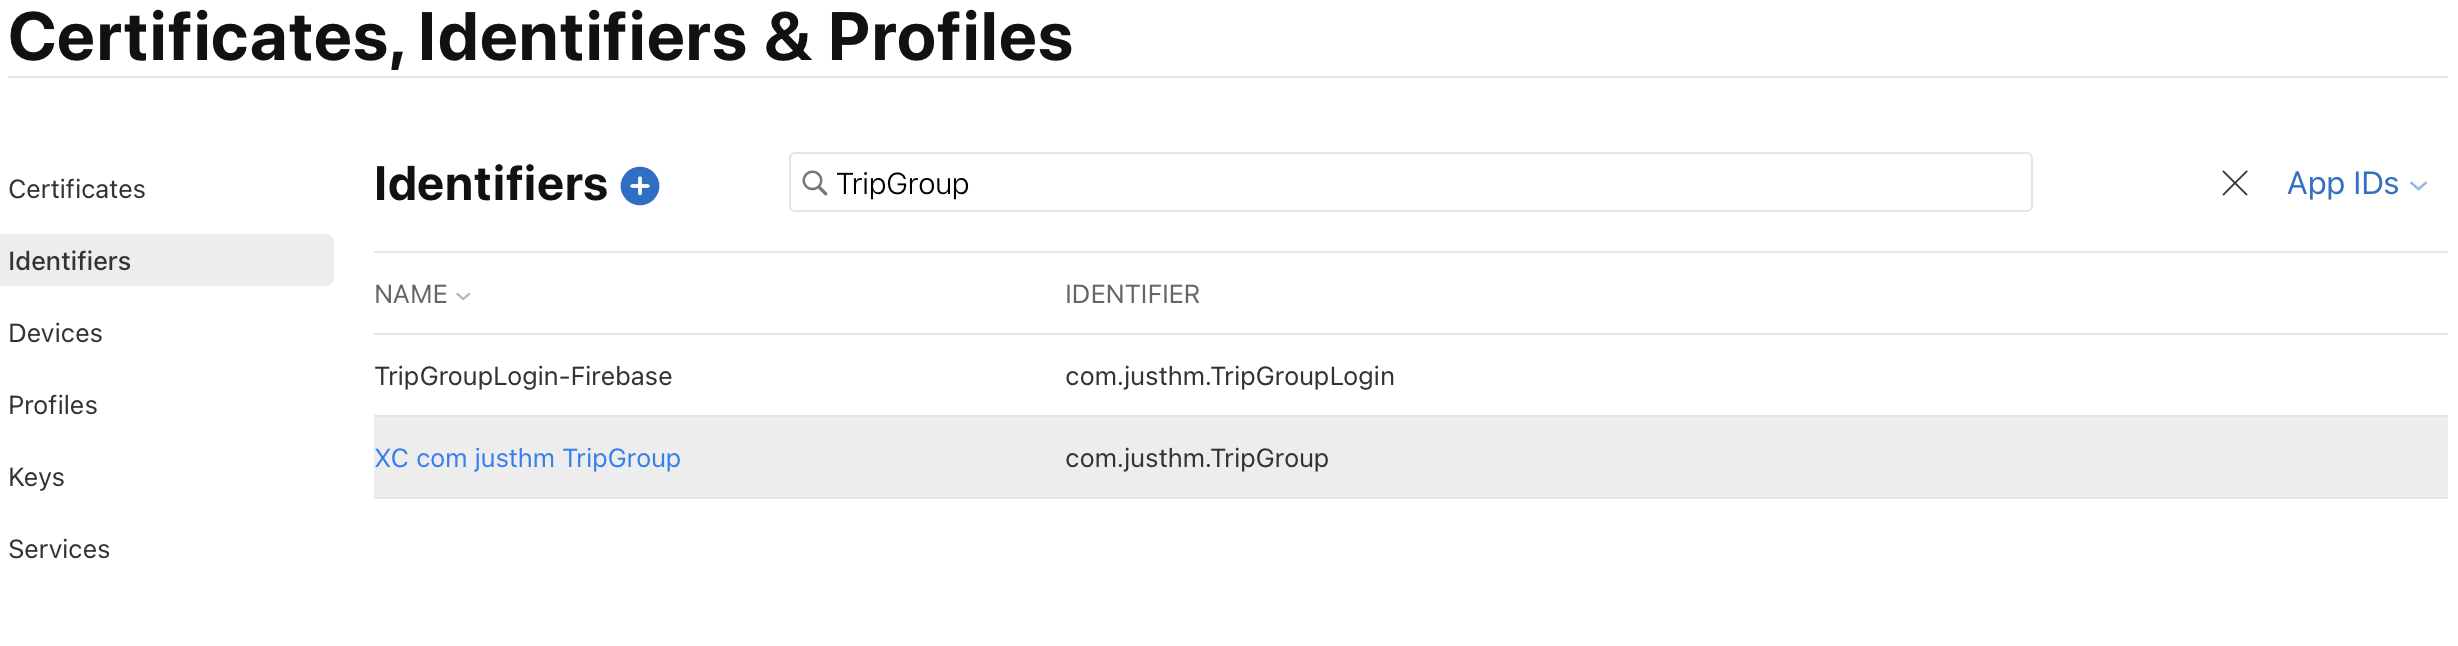
Identifiers의 + 버튼을 누르면 서비스를 사용하기위한 Identifier를 추가할 수 있다.
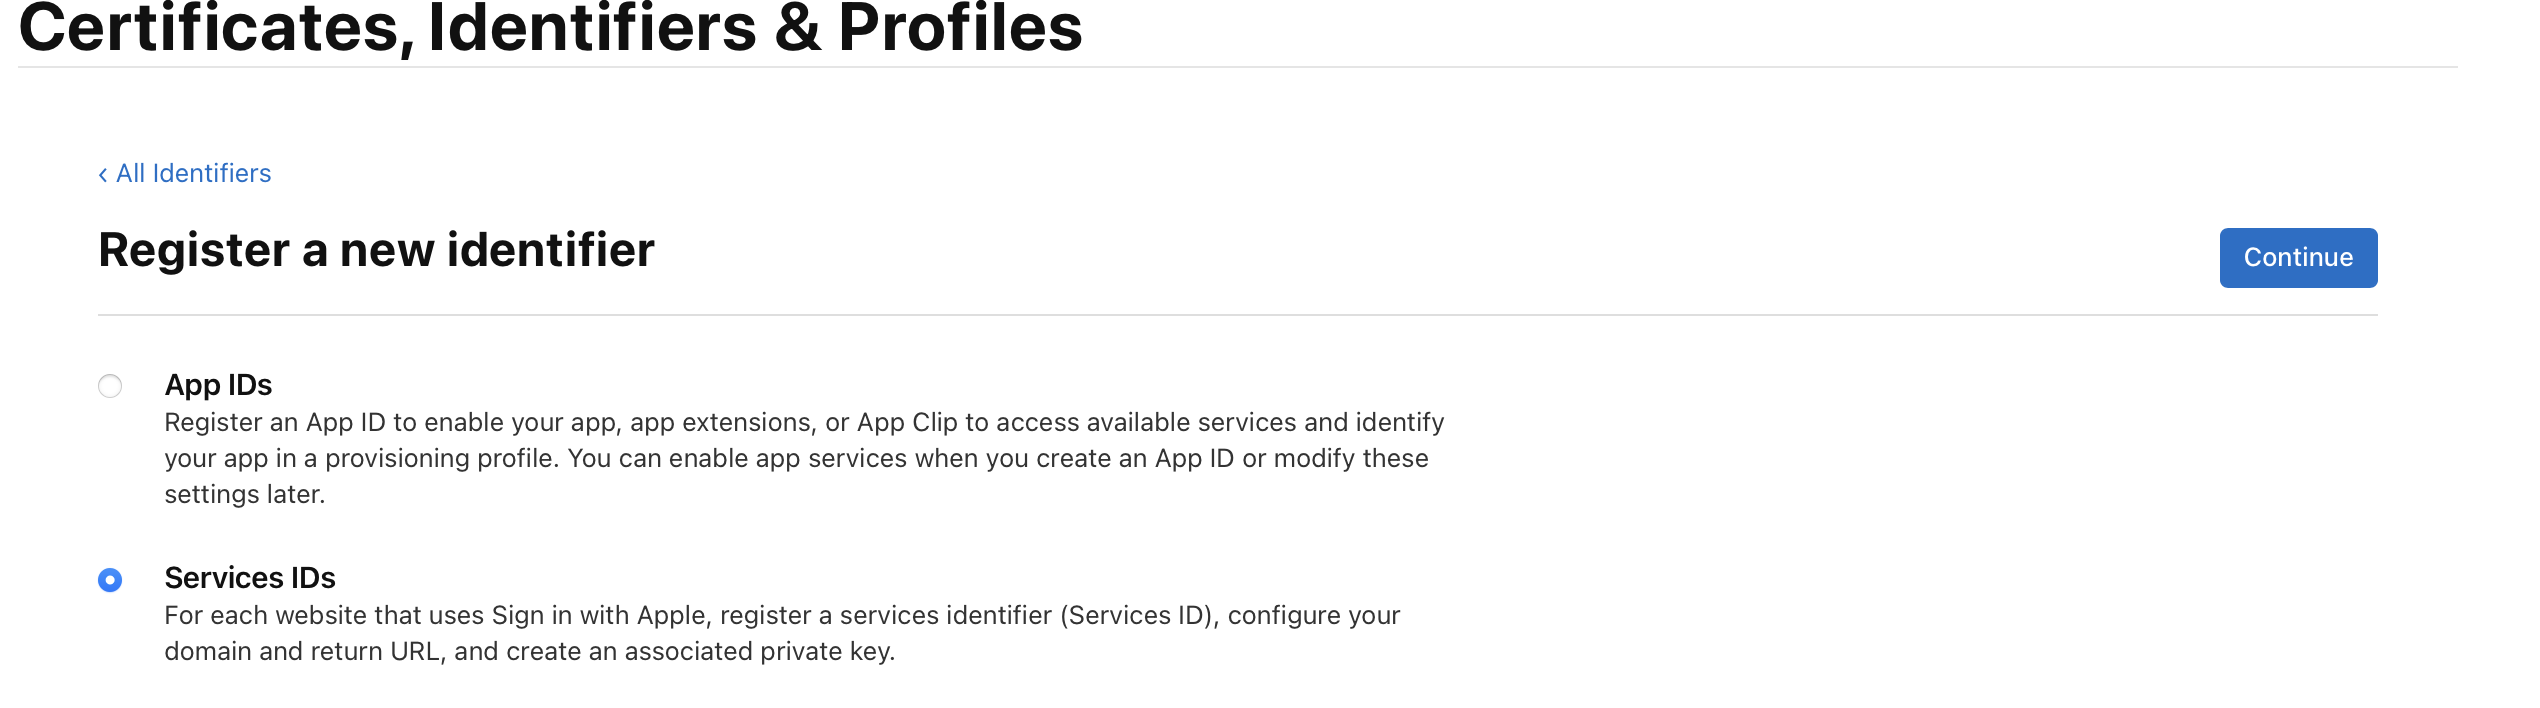

필드를 채우고 register를 하면 아래와 같이 Identifier가 추가된다. (TripGroupLogin)

생성한 서비스 ID를 눌러서 들어가면 Sign in with Apple 서비스를 체크하고 Configure를 눌러 마지막으로 필드를 채워준다.
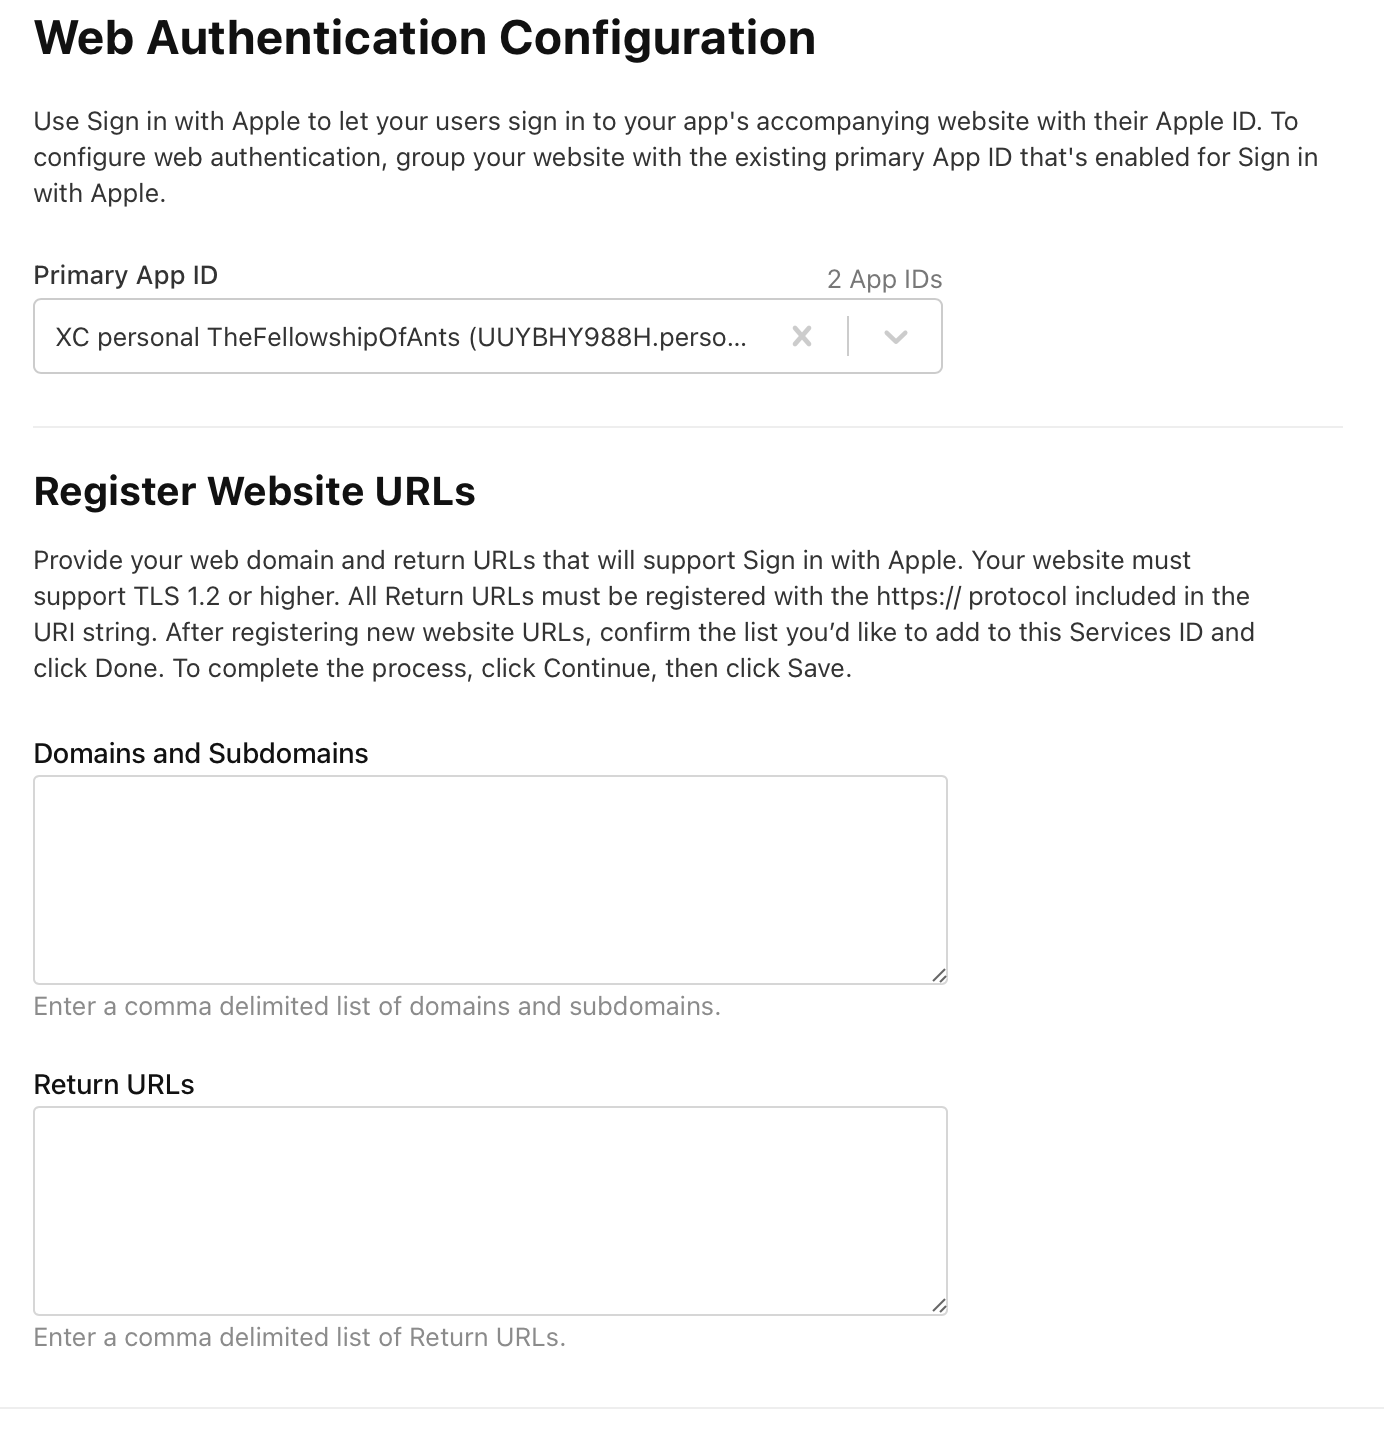
첫 번째 필드는 프로젝트의 Bundle Identifier를 선택하면 된다.
두 번째 필드는 Firebase에서 받은 주소를 입력한다.

세 번째 필드도 Firebase에 있다. Apple 제공업체를 선택했을 때 있던 Return URL을 넣어주면 된다.
그렇게 하고 저장하면 Apple Login을 사용하기 위한 선행작업이 완료된다.
4. Apple Login 코드 구현
Apple Login을 사용하기 위해서 AuthenticationServices 를 사용해야 한다. Firebase문서에서 알려주는 방식대로 따라가면 된다.
Firebase문서에 있는 코드를 그대로 가져다 사용했다. SwiftUI라고 해서 다를건 없다 ViewModel을 생성해서 구현하였다.
import FirebaseCore
import FirebaseAuth
import GoogleSignIn
import GoogleSignInSwift
//Apple 로그인에 사용
import AuthenticationServices
import CryptoKit

@MainActor
final class AuthViewModel: NSObject, ObservableObject {
    // Unhashed nonce.
    fileprivate var currentNonce: String?

    @available(iOS 13, *)
    func appleSignIn() {
        let nonce = randomNonceString()
        currentNonce = nonce
        let appleIDProvider = ASAuthorizationAppleIDProvider()
        let request = appleIDProvider.createRequest()
        request.requestedScopes = [.fullName, .email]
        request.nonce = sha256(nonce)

        let authorizationController = ASAuthorizationController(authorizationRequests: [request])
        authorizationController.delegate = self
        authorizationController.presentationContextProvider = self
        authorizationController.performRequests()
    }
}
Delegate와 Provider를 채택해 구현해줘야 로그인 서비스를 사용할 수 있고, 로그인 후 성공 실패시 Delegate로 분기를 처리할 수 있다.
// MARK: Apple 로그인 AuthenticationServices 구현부
extension AuthViewModel: ASAuthorizationControllerDelegate, ASAuthorizationControllerPresentationContextProviding {

    func presentationAnchor(for controller: ASAuthorizationController) -> ASPresentationAnchor {
        return ASPresentationAnchor()
    }

    func authorizationController(controller: ASAuthorizationController, didCompleteWithAuthorization authorization: ASAuthorization) {
        if let appleIDCredential = authorization.credential as? ASAuthorizationAppleIDCredential {
            guard let nonce = currentNonce else {
                fatalError("Invalid state: A login callback was received, but no login request was sent.")
            }
            guard let appleIDToken = appleIDCredential.identityToken else {
                print("Unable to fetch identity token")
                return
            }
            guard let idTokenString = String(data: appleIDToken, encoding: .utf8) else {
                print("Unable to serialize token string from data: \(appleIDToken.debugDescription)")
                return
            }
            // Initialize a Firebase credential, including the user's full name.
            let credential = OAuthProvider.appleCredential(withIDToken: idTokenString,
                                                           rawNonce: nonce,
                                                           fullName: appleIDCredential.fullName)
            // Sign in with Firebase.
            Task { await signInFirebase(credential: credential) }
        }
    }
    func authorizationController(controller: ASAuthorizationController, didCompleteWithError error: Error) {
        // Handle error.
        currentError = error
        isAuthHasError.toggle()
        print("Sign in with Apple errored: \(error)")
    }

    private func randomNonceString(length: Int = 32) -> String {
        precondition(length > 0)
        var randomBytes = [UInt8](repeating: 0, count: length)
        let errorCode = SecRandomCopyBytes(kSecRandomDefault, randomBytes.count, &randomBytes)
        if errorCode != errSecSuccess {
            fatalError(
                "Unable to generate nonce. SecRandomCopyBytes failed with OSStatus \(errorCode)"
            )
        }

        let charset: [Character] =
        Array("0123456789ABCDEFGHIJKLMNOPQRSTUVXYZabcdefghijklmnopqrstuvwxyz-._")

        let nonce = randomBytes.map { byte in
            // Pick a random character from the set, wrapping around if needed.
            charset[Int(byte) % charset.count]
        }

        return String(nonce)
    }

    @available(iOS 13, *)
    private func sha256(_ input: String) -> String {
        let inputData = Data(input.utf8)
        let hashedData = SHA256.hash(data: inputData)
        let hashString = hashedData.compactMap {
            String(format: "%02x", $0)
        }.joined()

        return hashString
    }
}
authorizationController(controller:, didCompleteWithAuthorization)
authorizationController(controller:, didCompleteWithError)
위 두 함수를 추가하면 로그인이 끝난 후 성공, 실패에 따라 호출이 되어 성공시 Credential를 받아 Firebase에 로그인 처리를 할 수 있다.
보안도 중요하기 때문에 난수문자열생성과 sha256 알고리즘을 사용해 생성된 String을 request할 때 사용하는 것을 볼 수 있다..
프로젝트를 만들면서 공부한 내용 업로드 하는 중
https://github.com/JustHm/TripGroup
GitHub - JustHm/TripGroup: 여행 모임 기록 어플
여행 모임 기록 어플. Contribute to JustHm/TripGroup development by creating an account on GitHub.
github.com
Firebase Auth와는 상관 없긴 하지만, ASWebAuthenticationSession을 사용해 웹 로그인 받아오는 것도 있길래 여기에 남겨놔야 겠다.
https://www.andyibanez.com/posts/using-aswebauthenticationaession-swiftui/
Using ASWebAuthenticationSession with SwiftUI
Learn how to integrate ASWebAuthenticationSession with SwiftUI
www.andyibanez.com