

728x90
화면 전환하는 방법
- storyboard에서 전환
- code로 전환
먼저 storyboard에서 전환하는 것 부터 확인하겠습니다.
storyboard에서 item을 오른쪽 클릭하여 다른 View로 옮기면 이런 화면이 뜹니다.

- Show
- 연결된 새 화면으로 이동합니다. Navigation Stack에 하나씩 쌓여 관리됩니다.
- Show Detail
- IPad 에서 사용하면 SplitView의 DetailView가 새 화면으로 대치됩니다.
- IPad 에서 사용하면 SplitView의 DetailView가 새 화면으로 대치됩니다.
- PresentModally
- 원래 화면에 새 화면이 덮어집니다. Show와 다르게 Navigation Stack에 영향은 없습니다.
- Present As Popover
- IPad 에서 사용하면 아래 사진처럼 작은 화면이 뜹니다.
- IPhone 에서는 PresentModally와 비슷한 동작을 합니다.

- Custom
- 사용자가 정의한 행동을 합니다
2가지 방식의 가장 큰 차이점은?
→ Show 방식은 Stack 에 저장되어 관리한다.
→ Present 방식은 Stack에 저장되지 않는다.
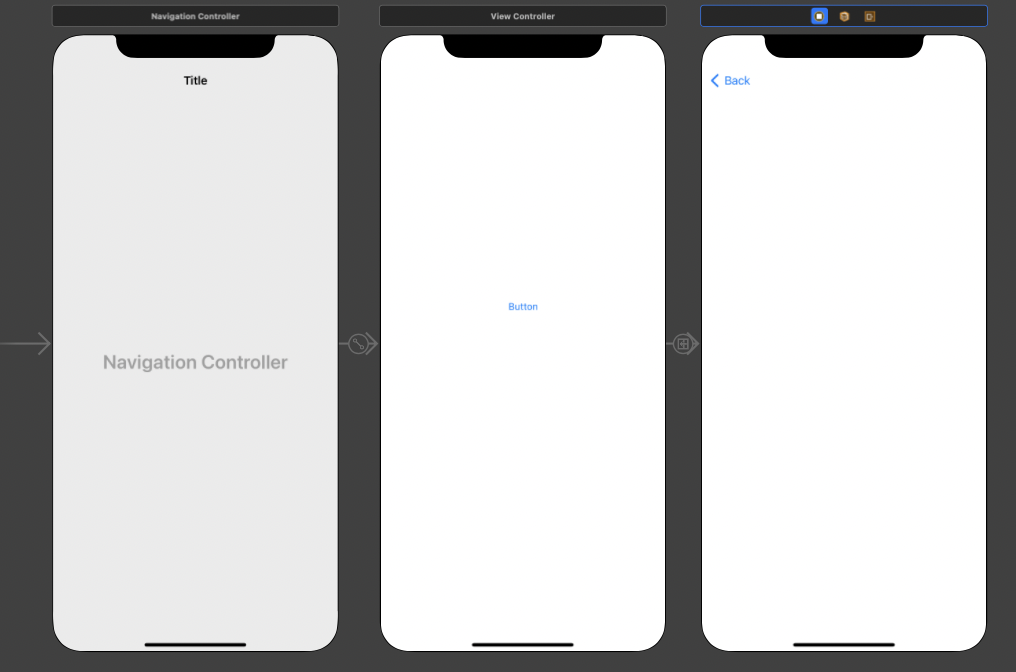
NavigationView를 연결해서 화면 전환을 관리하면 Back버튼이 왼쪽 상단에 생기기 때문에 돌아갈 때는 문제가 없다.
하지만! 코드로 구현할 필요도 있으니 알아보자.
Show
@IBAction func tapBack(_ sender: UIButton) {
        self.navigationController?.popViewController(animated: true)
}
Show Type은 Stack에 저장되어서 다시 돌아갈 때, 현재 VC를 Pop해서 돌아간다.
Present Type
@IBAction func tapBack(_ sender: UIButton) {
        self.presentingViewController?.dismiss(animated: true, completion: nil)
}
Stack에 저장되는 방식이 아니기 때문에 PresentingViewController로 관리한다.
Code로 화면 전환
Show
@IBAction func tapCodePush(_ sender: UIButton) {
        //스토리 보드를 객체화 시키는 작업.
        guard let viewController = storyboard?.instantiateViewController(withIdentifier: "CodePushViewController") as? CodePushViewController else { return }
        navigationController?.pushViewController(viewController, animated: true)
}
처음 - guard 문으로 옵셔널 바인딩을 해주고, viewController 변수에 할당하는 건 옮겨갈 스토리보드의 VC로 설정한다.
두번째 - navigationController Stack에 VC를 Push해준다.
Present
@IBAction func tapCodePresent(_ sender: UIButton) {
        guard let viewController = storyboard?.instantiateViewController(withIdentifier: "CodePresentViewController") as? CodePresentViewController else { return }
        viewController.modalPresentationStyle = .fullScreen // 전체화면으로 present
        present(viewController, animated: true, completion: nil)
}
처음 - 위와 동일하다.
두번째 - present()를 사용하여 화면을 띄운다.
추가)
- present방식 : viewWillAppear 부르지 않음
- navigation 방식 : viewWillAppear 부름
- segue 방식 : viewWllAppear 부르지 않음
navigation방식이 데이터 주고받기에 좋음
728x90